基于GitHub Pages使用Hugo搭建个人博客
Hugo是由Go语言实现的静态网站生成器。简单、易用、高效、易扩展、快速部署。

以下文字代码默认在win下运行
Hugo
- Hugo只有一个二进制文件(比如Windows里只是一个hugo.exe)
- Hugo可以将你写好的MarkDown格式的文章自动转换为静态的网页
- Hugo内置web服务器,可以方便的用于本地调试
- Hugo生成静态网页速度快
基础
- 安装Hugo
建议到Hugo Releases下载最新的对应系统版本的文件
- win下安装教程
- 选择对应版本的hugo下载
- 解压并安装 记住安装路径
- 在环境变量中添加hugo的安装路径
- 如果安装成功 在cmd中输入hugo –help会有回显
- 安装Git
- Github账号
生成站点
建立一个文件夹保存网站
在新建立的文件夹中右键选择Git Bash Here 进入命令行模式 输入
$ hugo new site mysite
然后查看mysite的目录结构
▸ archetypes/
▸ content/
▸ layouts/
▸ static/
config.toml
config.toml目录是hugo博客的配置文件,所有的全局配置都要放在这个文件中
创建第一个界面
$ hugo new about.md
about.md自动生成到了contant/about.md,使用vim打开about.md
---
title: "about"
date: 2018-03-09T13:57:53+08:00
draft: true
---
title是标题,date是创建的时间,draft=true表示这是一篇草稿,Hugo默认是不会渲染草稿状态的博客的,完成博客后使用
$ hugo undraft content/about.md
# 这个是我看的教程里给的代码 但是失败了 想了想还是放上来了 不过成功与否不影响搭建
改变draft或直接编辑为false
在- - -下面就是编辑的正文了
一般为了便于管理,不会直接将posts放在content文件下,可以在content目录内新建一个post目录:
$ hugo new post/first.md
可以看到在post下新生成了一个first.md文件
安装主题
可以直接使用hugo推荐的一些主题,比如我使用的blackburn,当让也可以自己挑选主题,以blackburn为例
git clone https://github.com/yoshiharuyamashita/blackburn.git themes/blackburn
将主题git clone到themes/blackburn目录下 更改config.toml 添加
theme = "blackburn"
即 指定使用这个主题
启动
在博客的根目录下 即mysite下执行命令启动hugo
$ hugo server --theme=blankburn --buildDrafts
如果在配置文件中已经配置了theme的话就不需要再指定 - -theme 参数了, - -buildDrafts 参数的意思是渲染所有的post包括 draft=true状态的。
打开浏览器,在地址栏中输入: http://localhost:1313, 就可以看到我们的博客了。
配置更改
一般来说只需更改baseUrl,其他使用默认配置就行
baseURL = "blank233.github.io"
#把博客部署到服务器上的时候注意要把配置中的baseurl改成自己的域名
主题配置也是在config.toml中,每个主题配置不尽相同,分享我自己使用的主题配置:
baseURL = "blank233.github.io"
languageCode = "en-us"
title = "BlankのBlog"
author = "Blank"

# Shown in the side menu
copyright = "© On the way."
canonifyurls = true
paginate = 10
theme = "blackburn"

[indexes]
  tag = "tags"
  topic = "topics"

[params]
  # Shown in the home page
  subtitle = "Move on"
  brand = "Menu"
  googleAnalytics = "UA-103593285-1"
  # CSS name for highlight.js
  highlightjs = "monokai"
  dateFormat = "02 Jan 2006, 15:04"


[menu]
  # Shown in the side menu.
  [[menu.main]]
    name = "Home"
    pre = "<i class='fa fa-home fa-fw'></i>"
    weight = 1
    identifier = "home"
    url = "/"
  [[menu.main]]
    name = "Posts"
    pre = "<i class='fa fa-list fa-fw'></i>"
    weight = 2
    identifier = "post"
    url = "/post/"
  [[menu.main]]
    name = "About"
    pre = "<i class='fa fa-user fa-fw'></i>"
    weight = 3
    identifier = "about"
    url = "/about/"
  [[menu.main]]
    name = "Contact"
    pre = "<i class='fa fa-phone fa-fw'></i>"
    weight = 4
    url = "/contact/"
  [[menu.main]]
    name = "Topics"
    pre = "<i class='fa fa-folder fa-fw'></i>"
    weight = 5
    url = "/topics/"
  [[menu.main]]
    name = "Tags"
    pre = "<i class='fa fa-tags fa-fw'></i>"
    weight = 6
    url = "/tags/"

[social]
  # Link your social networking accouns to the side menu
  # by entering your username or ID.

  # SNS microblogging
  # twitter = "nema"
  # facebook = "name"
  #googleplus = "/u/0/110451572416739183954"
  weibo = "6070994053"

  # SNS career oriented

  # SNS news
  #reddit = "*"
  #hackernews = "*"

  # Techie
  github = "blank233"
主题配置,可参考 https://themes.gohugo.io/blackburn/
另,topics和tags的使用,只需在**.md文件的头部添加topics和tags字段即可,例
---
title: "Create_Hugo_website"
date: 2018-03-09T13:57:53+08:00
draft: false
tags: [2018-03]
topics: [misc]
---
这样就能使用topics和tags了
缩略图
缩略图需要在md文件中添加如下代码
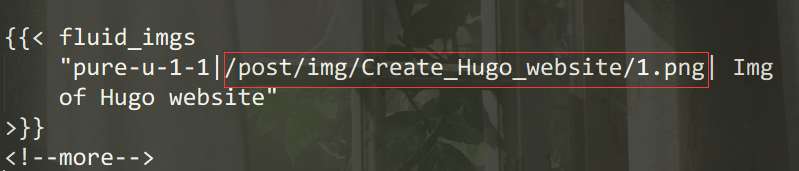
- FAQ
F:为什么这一段代码不是文本而是图片QAQ
Q:粘贴代码就会hugo解析成图片 = =!
部署到Github
如果你需要部署在GitHub Pages上,首先在GitHub上创建一个Repository,命名为:blank233.github.io (blank233替换为你的github用户名)。 并且要在该Repository的setting里面,GitHub Pages设置一下
注:不会设置的可以参考这里
在博客的根目录下执行命令
$ hugo --theme=blackburn --buildDrafts --baseUrl="https://blank233.github.io/"
如果一切顺利,所有静态页面都会生成到 public 目录,将pubilc目录里所有文件 push 到刚创建的Repository的 master 分支
$ cd public
$ git init
$ git remote add origin git@https://github.com/Blank233/Blank233.github.io.git
$ git add -A
$ git commit -m "first commit"
$ git push -u origin master
注:在使用git之前需要ssh验证,不会的点这里 浏览器里访问:https://blank233.github.io/ 就可以访问你的博客了
操作总结
# 新建博客markdown文件,并编辑博客内容(文件名为 **.md )
$ hugo new post/useGit.md
# 生成静态页面
hugo --theme=blackburn --buildDrafts --baseUrl="https://blank233.github.io/"
# 发布
cd public
git add .
git commit -m "new blog added"
git push origin master
结尾
本次搭建到此结束 谢谢观看